
How to Create Accessible PDFs
- Creating Accessible PDF Files
- Inaccessible PDF Challenges
- Make Accessible Action Wizard
- Checking PDF Accessibility
- A Journey
- Additional Resources on PDF Accessibility
Creating Accessible PDF Files
Creating a Text-based PDF from an SMC Copier
-
Choose the Searchable (versus Image) option.
The resulting document will not be a paragon of PDF accessibility because its structural elements will not be labeled or in PDF parlance, tagged. The lack of tags affects accessibility for people who are blind and learn about the document structure from their screen readers rather than by looking at the document.
Creating a PDF File from a Word Doc
-
Create a well-structured Word document. (LINK to Word How TO.)
-
Open the File menu, and choose Save As.
-
From the Save as type: options, choose PDF.
-
Select Options.
-
Be sure the Document Structure tags for accessibility checkbox is checked, then click OK.
Starting with an Image PDF
If only the image PDF file is available, convert this file into a text-based PDF file.
Directions based on Acrobat Pro 11:
-
Open the image PDF.
-
Open the Tools menu, and choose Text Recognition.
-
Choose In This File.
-
Click OK, and Acrobat Pro will transform the document using optical character recognition (OCR) technology.
-
Save the text-based PDF.
-
The resulting document will not be entirely accessible because its structural elements will not be labeled/tagged. The lack of tags affects accessibility for people who are blind and learn about the document structure from their screen readers rather than by looking at the document.
Tags Pane
The Tags pane allows you to view, reorder, rename, modify, delete, and create tags. Many of these actions can be completed more easily using the TouchUp Reading Order tool (Links to an external site.) outlined below, but there are some actions that can only be accomplished in the Tags pane.
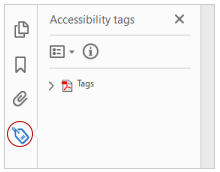
To view the Tags pane, select View > Show/Hide > Navigation Panes > Accessibility Tags. This pane displays the all the tags within the PDF, organized in a tree structure. This tags tree can be navigated, expanded, and collapsed using a mouse or the arrow keys on the keyboard.
Many of the tags are similar, if not identical to HTML. The most notable exception
is the <Figure> tag, which is similar to the <img> tag in HTML.
Highlight Content
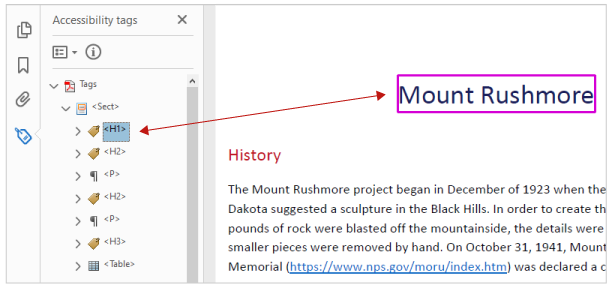
When the Highlight Content option is selected in the Options menu, selecting a tag should highlight the corresponding text, image, or other element in the PDF file.
Find Tag from Selection
Just as selecting a tag highlights the content in the body of the PDF file, there is a way to accomplish the opposite effect of highlighting the tag that corresponds to selected content. First, click on the Select Too. Next, select text, an image, or a table. Finally, select the Options menu at the top of the Tags pane and then select Find Tag from Selection. This will highlight the tag or tags that contain the content you previously selected.
Change Tags
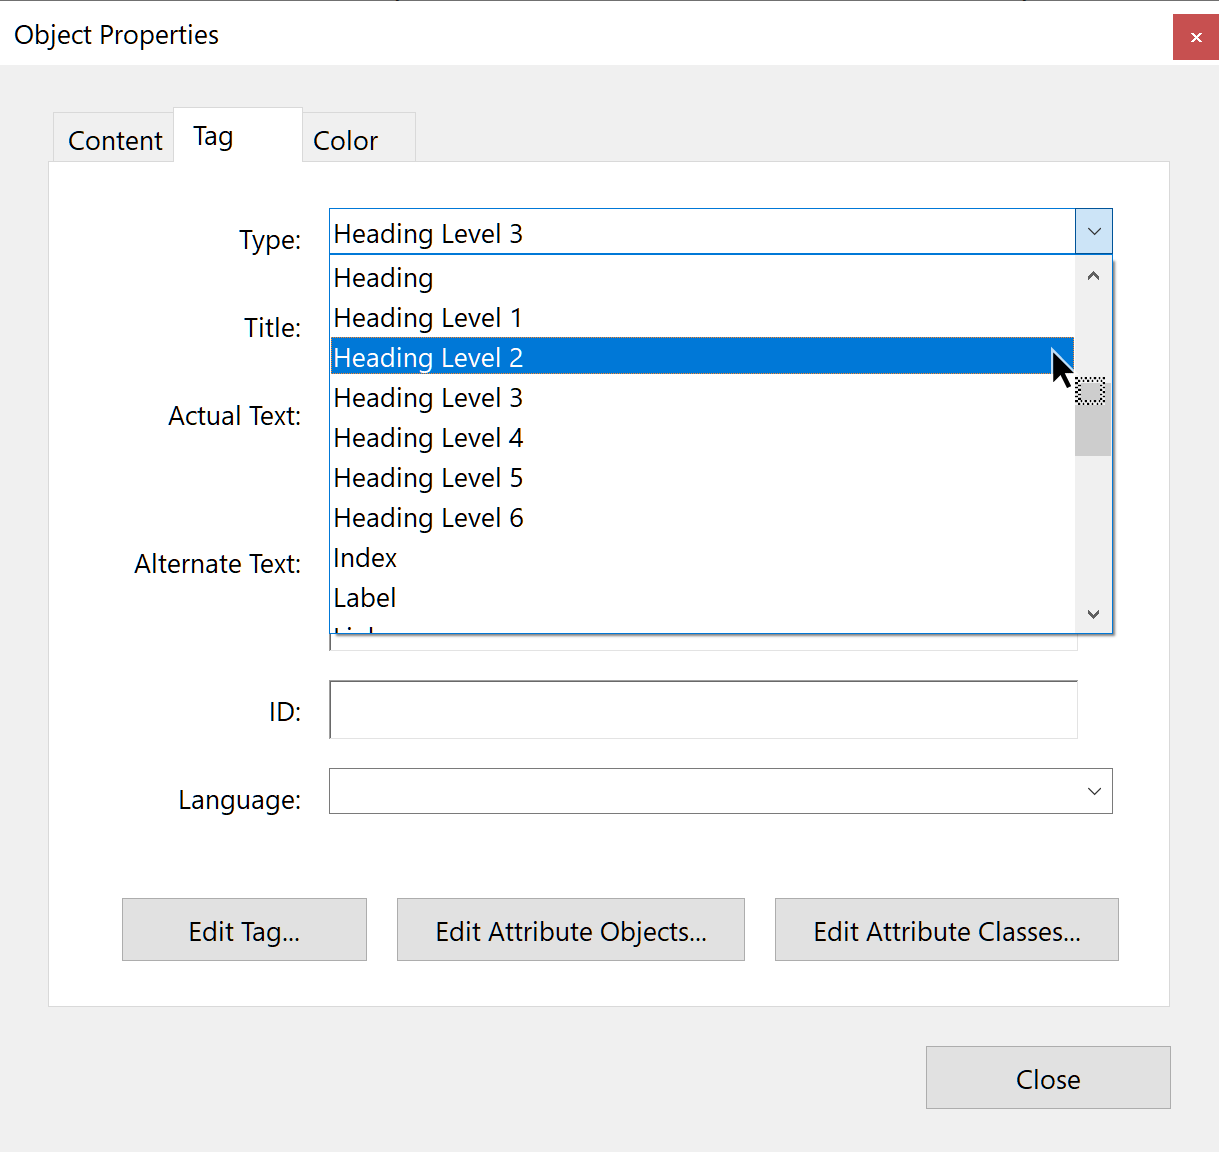
At times, you will encounter a PDF file that contains incorrect tags. You can modify these by right-clicking the tag you want to change, selecting Properties, then the Tag tab, and then selecting the appropriate new tag type from the dropdown list labeled Type.
Add Tags to an Untagged Document
To add tags to an untagged document, choose Tools from the right-hand menu, then select Accessibility > Add Tags to Document. This process can sometimes be time-consuming, and you will almost certainly have to edit some of the tags, but it is usually faster than doing all the work manually. This is especially true if the document contains tables.
TouchUp Reading Order
The TouchUp Reading Order (or TURO) tool allows a user to add and edit many common PDF tags, and to view the content order of elements on the page. Although it can speed up the tagging process, it does not take the place of the other tools mentioned previously. Certain tags, such as lists, are only available in the Tags pane.
To use the TURO tool, select Tools from the right-hand menu, then select Accessibility > TouchUp Reading Order. If the Accessibility menu is not visible (it is hidden in version XI by default), make sure it is checked in the option menu in the upper-right corner of the Tools sidebar. When the TURO tool is selected, the view on the screen changes. All of the content is enclosed in numbered boxes. Each of these numbered boxes corresponds with the content order of the PDF, as reflected in the order pane.
Content Order
There are actually three different types of 'reading order' within a PDF: the visual order that most people see when viewing a PDF, the tags order that is accessed by screen readers and other assistive technologies, and the lesser-known content order that is used by Adobe when a user selects Reflow or Read Out Loud options.
While the goal is to get these three views to match, this is not always easy to accomplish. For example, if a PDF is created from a MS Word DOCX file, text boxes and images usually appear in the correct place in the tags order, but they typically appear at the end of the page in content order.
Important
The TURO tool displays the content order of the PDF, NOT the tags order. Reading order can appear correct in this view but the PDF may still be read incorrectly by a screen reader (or vice versa). Only the Tags Pane provides a true indication order that content will be read by a screen reader.
The TouchUp Reading Order window includes a number of options to change tags within a page.

You will notice a group of buttons with the names of several common tags. You can
use these buttons to assign tags to a selected block of text or an object.
Note: If you have the TURO tool open and don't see any boxes, your PDF document is most likely untagged.
Adding/Changing Tags
There are two ways to select an area of text, image, table, or other element using TURO:
-
Drag a box around an element using the crosshairs that have replaced the default pointer. It is sometimes difficult to select exactly the right area, but it is a little easier if you try drawing a box that is slightly larger than the element. Once you have selected a new element, you can assign some of the most common tags to that element by clicking on one of the several buttons.
-
You can also select everything within a box by clicking on the number in the top-left corner.
Now that you have selected the text, you can assign a tag by clicking on the corresponding button. Once you select a button, Acrobat will place the selected content in the appropriate tag. If you have the Tags pane open, you can view these changes instantly.
While in TURO, you can also assign alternate text to images by right-clicking on the image and choosing Edit Alternate Text.
TouchUp Reading Order Options
|
Button |
Adobe Tag |
Additional information |
|---|---|---|
|
Text |
|
|
|
Form Field |
|
|
|
Heading 1-6 |
|
Only H1-H3 are available in Acrobat X. |
|
Figure |
|
|
|
Figure/Caption |
|
If you select the image and adjacent text then the image will be tagged as a figure and the text will be tagged as its caption. |
|
Table |
|
Acrobat attempts to assign rows, columns, and headings. Sometimes it does this correctly, but this should still be checked with the table inspector. |
|
Cell |
|
Can be used to merge cells if they are incorrectly split. |
|
Formula |
|
|
|
Background |
none |
This will hide an item completely from a screen reader. It can be used on images and text. |
Order Pane
The Order pane allows you view and edit the content order of a page. To open the Order pane, select or View > Show/Hide > Navigation Panes > Order or select Show Order Pane in the TURO tool.
To change the order of an element, just click and drag the tag to the location that reflects the correct reading order. This tool can be problematic because while it displays the content order (not the tags order), changes made within this panel will typically be reflected in both the tags and content order, but this behavior can be unpredictable. If there is a mismatch between these views, use the Content and Tags panes separately to reconcile these differences.
Alternative text
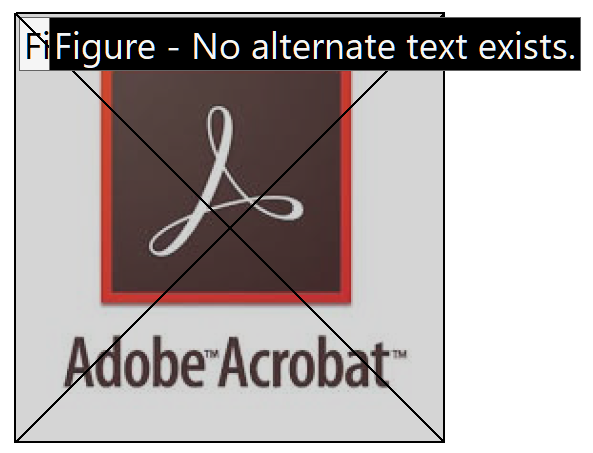
When an image is tagged as a figure, the alternative text will appear in a black box in the upper left hand corner of the image. If it has no alternative text, the caption will read "Figure - No alternate text exists."
To add or edit alternative text, right click on the image and select Edit Alternate
Text. Enter the appropriate alternative text (Links to an external site.) in the dialog box.
Table Inspector
The Table Inspector allows you to easily identify, create, and repair table headers.
With the Reading Order tool open, select a table and then select Table Inspector. Click and drag to select a group of the column or row headers. Right click on the selected cell or cells and choose Table Cell Properties.
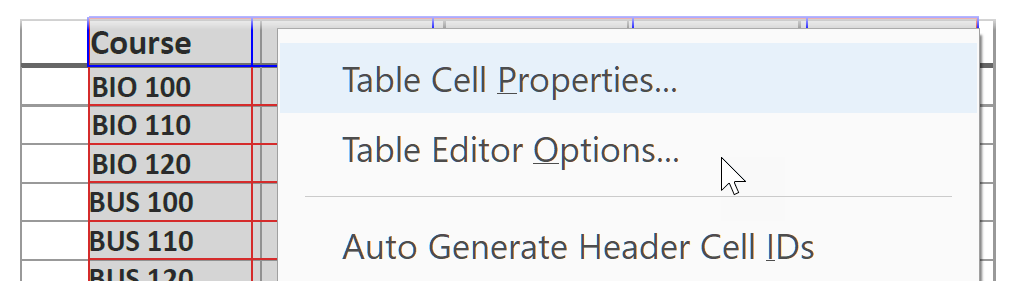
A dialog box will appear. Select the Header Cell radio button, then select the Scope menu and choose Row or Column (never choose "Both" or "None").

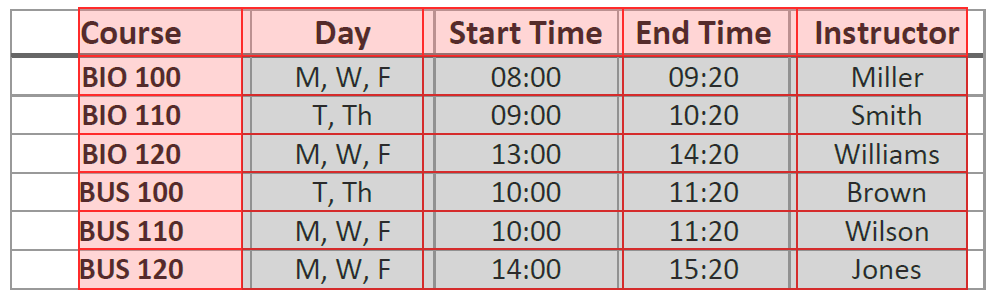
After selecting OK, you will notice that the table header cells are highlighted in red and the data cells will be highlighted in gray. Repeat for all the headers in the table.
Tables with more than one level of row or column headers, or with cells that span multiple rows or columns, may need extensive work to ensure they are presented correctly to screen readers. Whenever possible, simplify your tables to avoid this overhead. If the table structure is very poor, it may be easier to have Acrobat re-tag the table automatically. Click outside the table to exit the Table Inspector, then select the , and choose . Draw a box around the entire table and select the button. The quality of the tags for a table can vary greatly—Acrobat does best when the table has clear borders between each cell and no background colors.
Artifacts
Artifacts are elements that are ignored by a screen reader, much like an image with empty alternative text in HTML. Important text should never be labeled as an artifact. The easiest way to change an element to or from an artifact is with the TURO tool. Select the element and press the Background button to make it an artifact.
To search for artifacts, go to the Tags pane and select Options > Find. A window will appear with several search options. Artifact is the default search, so click Find. If there are any artifacts, the search will identify them and allow you to change them to other elements.
To change a tag to an artifact in the Tags pane, right click on the item and select Change Tag to Artifact.
View "Structure Types" in Acrobat XI
By default, the TURO tool displays the reading order of the objects in a page, but this can be changed in Acrobat XI so that the tags or "Structure types" are displayed instead of the "Page content order". To make this change, select the Structure types radio button within the TURO window.
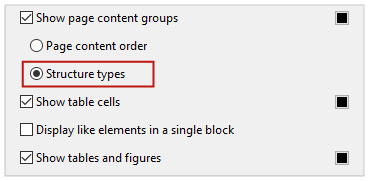
This will change the view so that the white boxes in the upper left corner of each
element displays the tag (e.g., "P" or "H1") instead of the reading order.
Other Tools and Features
"Set Alternate Text" in Acrobat XI
Alternative text can be added to all images in the document at one time using a great new feature in Acrobat XI. In the Accessibility sidebar, select Set Alternate Text. The first image in the document will be highlighted and a dialog box will appear with a space to enter the alternative text.
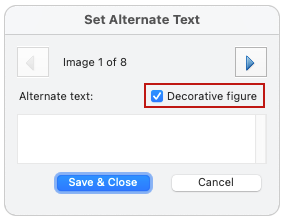
The dialog box also has a checkbox that allows you identify an image as a Decorative
figure (which is similar to alt="" in HTML) as well as previous and next arrows to
navigate through all the images in the document.
Inaccessible PDF Challenges
A PDF file has distinct advantages. It is the easiest way to create a digital document from print, and it always arrives looking exactly as it did when sent. However unless the PDF creation process is handled properly, our PDF files can present the following accessibility obstacles.
Obstacles Presented by Image PDFs
-
PDF documents created from scanned images are not accessible to people who listen to text. This includes people who are visually impaired and also sighted people who learn better by listening.
-
Many students create study and essay notes from PDF files. However, It is impossible to select, copy, and paste text from image-based PDF files.
-
The Reflow (LINK to Reflow page) feature in Acrobat Reader and Acrobat Pro temporarily presents text in a single column the width of the document pane. This makes the document easier to read on mobile devices as well as when magnified on a monitor without having to scroll horizontally to read the text. This feature cannot function with an image-based PDF.
Obstacles Created by Unstructured (AKA untagged) PDFs.
-
Providing PDF files with actual text is only a first, albeit important, step in creating an accessible PDF file. To be truly accessible, PDF files need to be properly structured (e.g. with headings, true lists, no columns created with tabs etc.), just like Word documents (link to Word How To page). In fact, the best way to create a well-structured PDF file is to start with a well-structured Word document. Unless a PDF file is properly structured, screen reading software cannot communicate to blind people anything about the organization of the document. Additionally, reading software may read poorly-structured documents (Link to Churchill file) in the wrong reading order. accessibility.
Make Accessible Action Wizard (Acrobat Pro XI +)
This Wizard helps improve the accessibility of PDF files.
Follow the steps below to run the Wizard:
-
Open the Tools pane and choose Action Wizard.
-
Be sure the Action Wizard options are expanded.
-
Choose Make Accessible.
-
Click Start.
-
The Action Wizard will walk through steps to make the document more accessible. Support for using the Wizard and understanding its results is available from the Disabled Student Services, High Tech Training Center Faculty.
Checking PDF Accessibility
Image versus Text PDF Quick Check
If the document has selectable text that is capable of being copied and pasted into another document, then it is a text-based PDF file. Great! This is a fundamental cornerstone of PDF accessibility.
Accessibility Check
Acrobat Professional X includes two different Accessibility Checks. The first, the Quick Check, is not very helpful--it basically tells you whether the file has tags or not. It doesn't identify even the most basic errors, such as missing alternate text. The accessibility "Full Check" (available in both Acrobat X and XI) is a much better option. This can be a good tool to ensure that nothing was overlooked (e.g., document language). To run the full check, select Tools in the right-hand column, > Advanced > Accessibility > Full Check. The Accessibility check in version XI is a bit more complete than version X and provides better documentation.
Reflow
The Reflow view allows users to reorder the content of a PDF into a simplified, single-column layout, based on the content order. Select View > Zoom > Reflow or Control + 4. If the document does not appear in the correct order while in Reflow view, the order of the tags will need to be changed.
Read Out Loud
Read Out Loud is a text-to-speech tool that is available in Adobe Reader and Acrobat. Because it reads the PDF based on the content order, it should not be used in place of a screen reader for testing.
Action Wizard
The Action Wizard helps automate multi-step processes, like the creation of an accessible PDF.
"Make Accessible" Wizard in Acrobat XI
The "Make Accessible" action Wizard in Acrobat XI is a great tool that includes several improvements over version X. It is a helpful way to ensure that you don't miss any steps while making your document accessible. It is especially helpful in identifying those easy-to-overlook steps like providing a page title or document language. To run the wizard, select the Tools sidebar > Action Wizard > Make Accessible. The wizard will then run you through several steps:
- Add Document Description
- Set Open Options
- Recognize Text using OCR
- Detect Form Fields
- Set Tab Order Property
- Set Reading Language
- Add Tags to Document
- Set Alternate Text
- Run Accessibility Full Check
Missing from this wizard is a step to check the quality of your tags using the TURO tool. Otherwise, it is very thorough and helpful. For most documents, running this wizard would be a great first step.
Note
For a video walk through and handout on the "Make Accessible" Wizard, see the GOALS Acrobat XI cheat sheet (Links to an external site.).
"Create Accessible PDFs" Wizard in Acrobat X
To use the action wizard in Acrobat X, select Tools in the right-hand column, then select Action Wizard > Create Accessible PDFs. The wizard will guide you through five steps:
- Add Document Description
- Instructions
- Remove Hidden Information
- Add Tags to Document
- Accessibility Check (Full)
This wizard misses a few key steps such as recognizing the text using OCR, but it can still be a helpful for common issues such as missing page title.
Accessibility Checking in Depth
-
Open Acrobat Pro Accessibility Check (Acrobat Pro XI)
-
Open the Tools pane and choose Accessibility.
If Accessibility is not yet part of the Tools pane, do the following.
Open the View menu and choose Tools, and then Accessibility. Accessibility should now be a permanent part of the Tools pane.
-
Be sure the Accessibility options are expanded. From the Accessibility options, choose Full Check.
-
Click the Start Checking button.
-
An accessibility report will appear in a pane on the left side of the window.
A Journey
Eventually, SMC will create and share only fully accessible PDF files facilitated by more training opportunities on converting well-structured Word documents to PDF files. For now, begin by creating and sharing text-based PDFs only. Consult with the High Tech Training Center Faculty to create and convert complex PDF files (ones with tables, forms, many organizational levels) into fully accessible documents.